
My first step was to consult with my friend Teddy Spiliopoulos from Tech X Solutions who has been installing speakers for years. I figured since he averages about 20 minutes per speaker, taking a half day on the weekend would be plenty of time for me to complete the project. In fact, it took me much longer--in some ways it was a complete disaster. If your walls are made with drywall, making holes in them is easy. But I had to cut holes using multiple power tools to break into rock lath (gypsum board). I came across every scenario that could go wrong. But if you follow my advice you won't make the mistakes I did, and you'll be done in about 3 hours.
5 gigantic speakers
For the project to make sense, the new speakers needed to be capable of outperforming the old ones. I chose to go with the company known for innovating in-wall speakers, Sonance. The company's Cinema Series is designed to appeal to the home theater enthusiast. My configuration: Three Cinema LCR2s for the main speakers (left, right and center channels), and for the rear channels, two Cinema SURs. You may choose less expensive models, but the installation instructions outlined here should be the same.
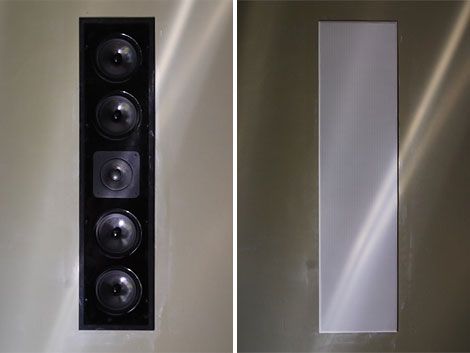
When I unboxed one of the Cinema LCR2s I was stunned at its size. The box revealed a massive, all-enclosed, 34-inch-tall, 29-pound monster. For a minute I thought it might not fit in the wall. The speaker box houses four 5º-inch woofers, a 1-inch tweeter and a 4-inch midrange. Well-crafted and elegantly designed, these speakers have a slick, polished, modern style that goes well with flat-panel TVs. The speakers come with grilles that make them virtually invisible, but they do take away from the "wow factor" these huge speakers relay when guests first enter the room.
The Basics
You need to measure your walls and understand a few rules of how the speakers should be installed. Sonance recommends that you should be sitting between 8 to 12 feet back from the wall with the TV and forward-facing speakers. The left and right speakers should be placed anywhere from 6 to 10 feet apart, 38 to 42 inches from the floor (ear level when sitting) and 18 inches from sidewalls. To maintain tonality between the front three channels, the center should be no more than 2 feet above or below the center of the left and right speaker if possible. The surround speakers should be installed directly to either side of the seating area, between 5 and 7 feet from the floor. All the measurements are based at the center of the speaker. Keep in mind that you'll have to make adjustments for the structure of the room and the different heights of your viewers.
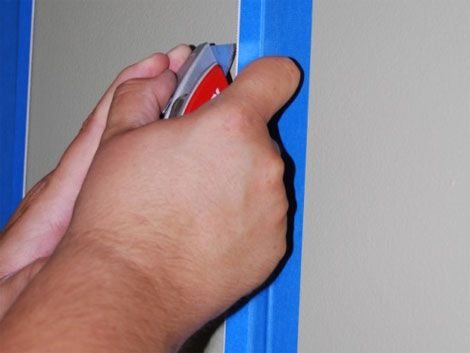
1. Tape the template to the wall with masking tape and score along the inside.
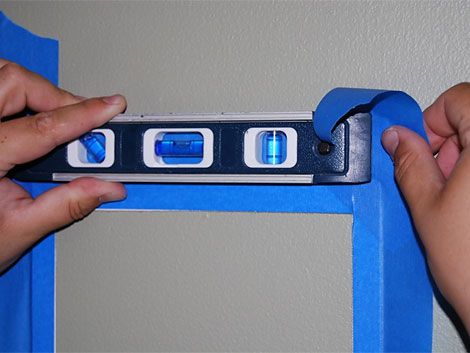
2. Double check to make sure the template is level.
Make some holes
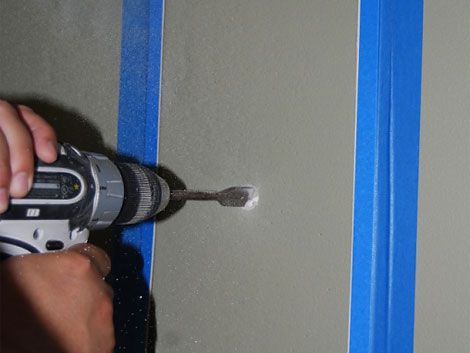
3. Drill a starter hole, increasing the circumference gradually.
There's going to be lots of dust. Remove as many furnishings from the room as you can and cover the rest well. Use a stud finder to locate each stud. Sonance includes a cut-out template with each speaker. Tape the entire template to the wall with masking tape. Use a tape measure and a level to check the alignments. Mark the inner dimensions of the template as well, just in case your template magically flies off the wall (yes that did happen to me). Set up all the templates before making a single cut. I found out the hard way that readjusting a paper template is much easier than patching holes--I corrected three out of five holes because of a missed crossbeam and a doubled-up stud. With all the templates fastened to the walls, recheck your measurements and play it safe--hit them with the level one more time.
Start cautiously by drilling a pilot hole in the center of the first template. Push a piece of wire through the hole, spinning it around and feeling for obstacles. Increase the diameter of the hole gradually by 2 or 3 inches and recheck the cavity. Eventually make the opening wide enough so you can carefully fit your hand inside. The wider opening makes it easier to inspect the wall cavity for obstructions like wires or something as small as a protruding screw or nail. If something is blocking the installation, a hand-size hole is small enough that your template should have some wiggle room to move in one direction or another away from an obstruction.
4. Cut the walls in sections after checking the measurements inside the wall cavities.
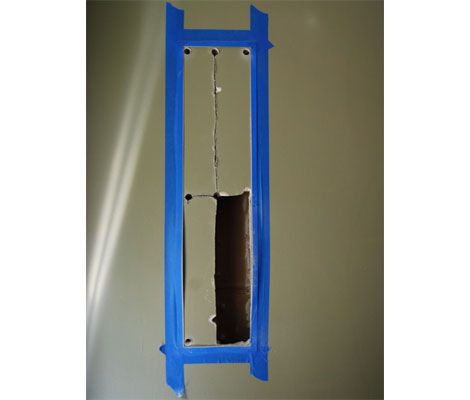
5. Remove any obstructions.
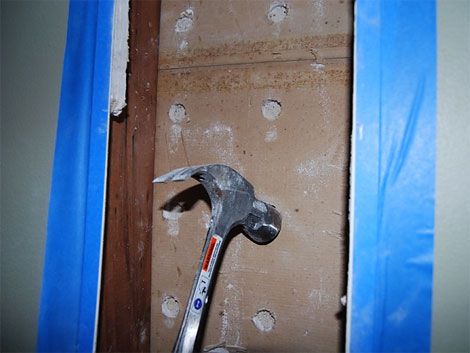
Don't forget that if you move one template, you have to move the others. It never hurts to measure again. This time, measure inside the wall cavity in four directions (up, down, left and right), making sure that the tape measure doesn't touch anything like extra beams. (I told you I ran into problems.) Once you've checked everything, the rest is easy. In the four corners of the template, drill 1/2-inch pilot holes then add one in between every two. Use either a hand drywall saw or a reciprocating saw to cut the hole. Start in the center, working your way down and across, then cutting upward in sections. The first one is the hardest; the rest go much faster.
Drop in wires
6. Use a drop chain to pull wires up through the cavity.
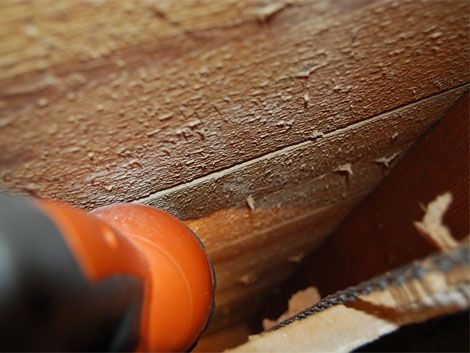
7. Go fishing for speaker wires with a coat hanger.
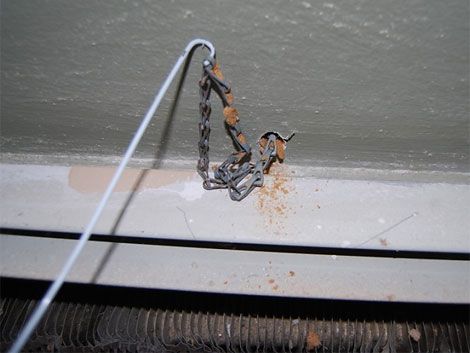
Route the speaker wires by inspecting your house for pre-made entryways into the cavity of the walls before drilling any holes. If you need to make an opening, drill a small hole and use a snake, drop chain and a coat hanger (saved me a few times) to pull the wire through the hole. Going across the walls gets a bit more complicated, but a quick solution is to pull the baseboards off the wall and cut about a O inch of the drywall off using a utility knife. Now carefully staple wires to the exposed studs, then reattach the baseboards.
Fill the cavities
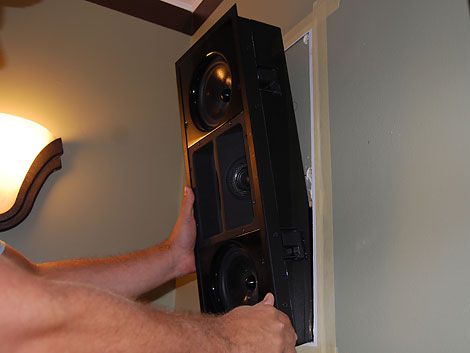
8. Place the Cinema speaker inside the wall and tighten the fasteners.
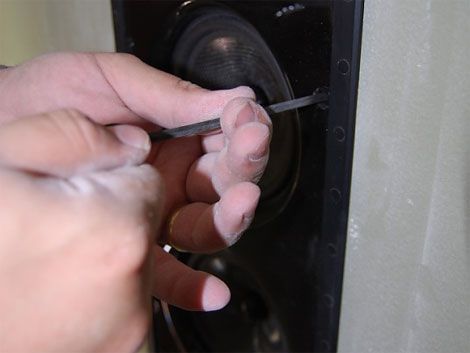
Fastening the speakers to the wall is straightforward. Sonance Cinema Series speakers feature the RotoLock mounting system to secure the speakers tightly in place. The clamps not only lock down the speakers but also help prevent wall vibrations. Attach the speaker wires to the dual binding post on the back of the speaker, place the speaker in the wall cavity and tighten the nuts on the front of the speaker in an "X" pattern with an Allen wrench. You can feel the RotoLock system tighten up. Be careful not to over-tighten.
Power up
9. The Sonance Cinema System can be installed with or without grilles. Grilles, no grilles, painted, unpainted: I cant decide. But four more of these and I'll be at the movies.
After going through all that, I flipped through the Dolby Digital channels on my satellite dish and settled on The Mummy 3. I've seen this movie before and hadn't been impressed the first time around. But when an avalanche started rolling, my living room felt like it was inside the avalanche. So after cheering like I was on a speeding roller coaster, I got up to get myself a cup of coffee. As I reentered my living room, the movie was in the middle of a gunfight and I actually ducked as I heard a ricochet from a bullet come from the rear speakers.
A system like this is also perfect for video games. I fired up Batman: Arkham Asylum on my PS3. As you pass objects like TV monitors while walking through the halls of Arkham, you can hear what's playing on the screen move from the front of the living room to the back of the room, eventually fading away. Plus it doesn't hurt to hear the bad guys coming up behind you.
The only problem is that I kept my old subwoofer. The 12-inch beast looks out of place on the floor next to the near invisible Sonance setup. I know that floor-standing subs are still the best, but maybe two 10-inch in-wall subs in the front will do the job just as well? I better get my power tools ready just in case.